In this example, I'm working with an alignment that crosses both an existing ground surface (EG) and a finished ground surface (FG). I've already created the alignment and I've added both surfaces via data reference. Here's how it looks so far:
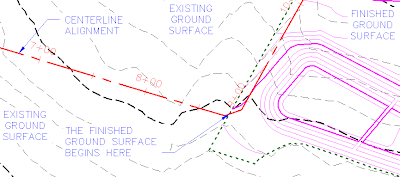
Now, the pipes in this drawing will need to stay a minimum distance below the existing ground surface (EG) until the alignment crosses into the finished ground surface (FG). At that point the pipes will need to stay a minimum distance below the finished ground surface. So how can I do that? I'm going to make a surface that is a combination of those two surfaces.
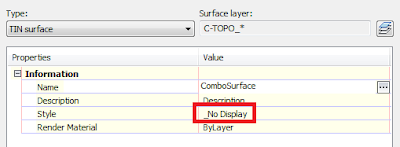
The first thing I'm going to do is create a surface called ComboSurface. In this case, I don't need to see the final product of the combined surfaces, so I'm going to set the surface style to _No Display.
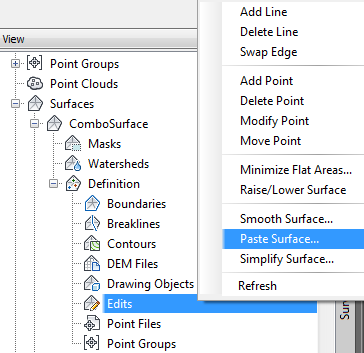
Now I need to add some substance to this surface. I'll do that by pasting the existing ground surface (EG) and finished ground surface (FG) into the new ComboSurface.
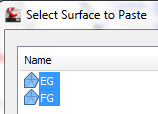
It's okay to select both surfaces at once.
When pasting surfaces into another surface, ORDER IS EVERYTHING! That means I need to make sure that the order is correct. Open the Surface Properties for the ComboSurface and select the Definition tab.
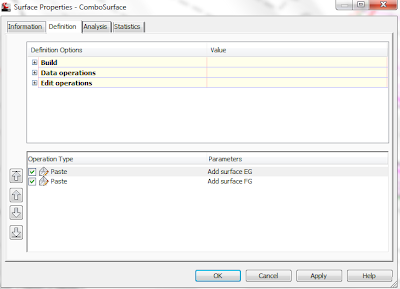 As you can see, the EG surface is at the top of the list and the FG surface is second in the list. This is exactly what I want for this surface. If the order is incorrect, select the EG surface and then left click on the "take me to the top up arrow"
  to send the EG surface to the top of the list.
Next, I need to make sure that this surface is set to Rebuild Automatically. To do this, I select the surface in toolspace, right click, then look for a check mark by Rebuild - Automatic. If there is no check mark (
 ), I left click on Rebuild - Automatic to enable this feature. If the check mark is there (
 ), I press ESC to cancel the change.
Now I have a surface that can be used for all the pipes and structures in my network!
In Part 2 of this series, I'll show you how to use this new surface in your pipe network.